 Just to re-cap when making a new composition in after effects you need to select the option below. Pal works in the U.K compared to American Video systems like NTSC.
 Alike to using In design, When using after affects you don't necessarily create a piece of work from scratch but you arrange a composition working with photoshop and illustrator files. To make sure you set up your photoshop file in the right format the document needs to be set to 72 dots per inch, in an RGB colour Mode.
 Another way of setting up the document with the right settings to work in Adobe After effects if you select the presets drop down from the new document window there is a film and video option. This brings up a selection of video options almost identical to the one in Adobe After effects.

 Safe zones can be turned on using this button found in the composition window. Always work with these in mind as you can't be 100% sure what will be visible when it comes to screen.
When importing files into Adobe After Effects alike to Indesign you open files in the same manor as placing them, selecting File/Import/File.

 This will place the file you have imported into the project window, This is good to be able to refer back to as you can see the path where the file came from.
If you add a file to the timeline it will automatically centre your file in the middle of your composition. Another way of using your file on your composition is dragging your file from the project window into your composition window. The transparency of the file is preserved in After effects because of the settings we chose when saving and importing.

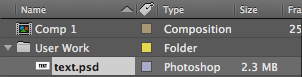
When importing a Photoshop file into After effects that has multiple layers you want to work with, you don't want to import it as a footage file, instead this time you need to import it as a composition file.

When this has been imported into After effects within the project window you can see a folder containing all the files different layers.
When working with the timeline window you can create key frames alike to what we learnt last week with simple shapes to animate your photoshop file, by working in multiple layers this gives you the ability to separate a file into different segments in relation to how its been edited in photoshop. I created a key frame for all of my layers for when I wanted my animation to begin, I then dragged the files into the positions I wanted them to appear a couple of seconds further into the timeline then created a new key frame.


When all layers are selected if you use the S shortcut you can manipulate the scale for multiple layers using the same principles and working to the same anchor point.
 Both Photoshop and Illustrator files are compatible with Adobe After Effects determined by the style of artwork you are working with. In order to simplify what you are viewing, if working with a lot of layers you can use the shy tool to hide specific layers for easy viewing. This will hide all layers for which the shy swift is set.
 If you need to lower the quality of a particular layer so that you can run your composition as quick as possible you can select the Quality tool next to the shy tool.
 The Fx tool just toggles different effects ON/OFF for different layers. This is self explanatory, but all it does it hide the effects you have on a specific layer.
 The motion blur switch says what It does, it can be turned on and off for individual layers and can make Ram Previewing significantly longer, The motion Blur tool simply adds a motion blur to the layer you're working with. The settings for this tool can be changed in The composition settings window. This is usually a trial and error process, the advanced settings use photographic terminology.
 The next tool is the adjustment layer tool, this is similar to photoshop where you can apply a layer with a certain effect which changes all the layers beneath the adjustment layer. It isn't necessarily visible but applies the adjustments to all the layers below.
No comments:
Post a Comment