
So far I've got to the stage below. I created the bubbles using mutiple white layers of circles drawn in photoshop simply moving each layer upwards whilst from side to side to create a bubble like effect. This was the most lengthy process as creating realistic characteristics of bubbles is hard to get your head around. I felt just using the 2 colours dark blue and white kept the video simple and to the point.
I created the bubbles in staggered layers up to 3.00 seconds then by 3.20 the opacity of these layers are reduced to 0%. Whilst this is happening a much smaller layer of bubbles starts to come on screen, these have a 100% opacity so are very apparent to notice, the aim being your attention is dragged downwards to the diver below.


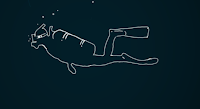
After this section The diver comes into frame, I want this to be a really smooth movement to communicate the fact that he's floating. The orientation of the X axis slightly between seconds 4 and 5 worked well to make it appear like his legs were begging to float above his body almost.


My video will then start to revel the National Geographic logo and the program information as the diver pans off screen. I want my type to float to the centre of the frame then travel towards the camera on the z axis. Progress can be seen below.
I've started to put together my other type layers keeping them as simple as possible, as I think with too much movement the information will become unclear. I want the type to follow the same stages as the National geographic logo staying on screen for a slight pause then heading towards the viewer. A few screenshots below show the stages I'm at so far. Selecting cast shadows from each 3D layers material options worked so well in adding depth to the type coming towards the screen, beforehand I had trouble centering the light and It hadn't worked as effectively as I'd hoped.


Below is a video of my final clip with no sound. The soundtrack is some scuba diving sounds of Underwater breathing that I'm yet to render with. I'm not to happy with the panning in and out in the first 5 seconds, I don't think It has been successful as I originally thought. You can see from the screenshot below that the spacing of the key frames are far too close across the shorter period of time, To resolve this I think I might just have a slight increase from 0.00 to 5.00 In the z axis of the camera. Slowly panning backwards before the diver and the text start to appear.

Video so Far;
I've made a few amendments to the camera angles throughout the start and so far my video is up to the stages below. I've noticed another small error. The diver layer has a small hairline in the top left hand corner which is where I've been using my graphic tablet and most likely drawn a line I've not acknowledged because of how white it is.

No comments:
Post a Comment