After
effects workshop
Adobe After Effects is a digital motion graphics and compositing software published by Adobe Systems, used in the post-production process of filmmaking and television production. Its main uses are the origination of 2D and 2.5D animation, visual effects compositing and finishing (image adjustment, color correction etc.). After Effects can also be used as a basic non-linear editor and a media transcoder.
After effects is split into 4 main sections the bottom two working with
time, the middle main window for a preview of your project and an audio window
on the right hand side for editing audio.

When opening a new document in after effect rather than going to file new document and opening another blank window you select new composition from the composition window. From here you can set up your document alike to illustrator or photoshop, changing different options to suit the document you're working with. The presets determine what form of output your file will be for, whether its Pal, NTSC, DVC or HDTV.


Once you have your blank window set up and ready to go it should look like the image below, a bit more lively than at first with your blank project ready to get started on.


To get started we needed to create a new shape, just working with a square at first to get used to how the program works. For future reference anything in After effects anything highlighted in yellow can be edited, for example the type to the right.
To create the new shape, I went to layer, new layer then selected solid. This brings up an optional drop down window so that you can create your shape.


The main zoom control when editing your timeline at the bottom of the window looks like the icon to the right.
To isolate layers and open them in separate tabs to each other in the comp window in the left hand side of the screen if you double click each specific layer they are separated out into a new tab for easier viewing.
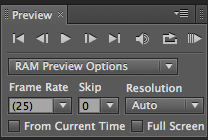 The preview window is a series of transport controls for playing your media, other than simply pressing the spacebar and playing a project through, it instead creates a temporary file of the project you're working with so when working with a complex file the computer manages the playback smoothly when working with a big file.
At the bottom of the composition window their is a drop down menu allowing us to change the viewing quality of the preview we are seeing above. If You're dealing with high definition films the computer can struggle and not be able to play your media back at a steady rate. If you drop these settings down using this window to quarter, the viewing will appear pixelated or distorted but when rendered it will still remain full quality.

Working in the layers window, if you select transform by clicking the small grey triangle next to your layer and then selecting the drop down transform menu it brings up a list of different modifications you can make to your layer.
When using this drop down menu you can add motion to a certain object. By using the position drop down and moving the layer you are working with you can create a path for the object to follow. This is achieved by selecting the position drop down so that a small yellow diamond appears, then dragging your object to a different area further along your composition.

Key Frames- A key frame in animation and filmmaking is a drawing that defines the starting and ending points of any smooth transition. They are called "frames" because their position in time is measured in frames on a strip of film. A sequence of keyframes defines which movement the viewer will see, whereas the position of the keyframes on the film, video or animation defines the timing of the movement. Because only two or three keyframes over the span of a second do not create the illusion of movement, the remaining frames are filled with inbetweens.
Positioning of key frames allows you to control the speed and distance an object travels on screen.

When using the transform controls there are a series of simple shortcuts so that all of the options aren't displayed and just the allocated toggle you want up will appear.
(Without the command Key)
P-Position
A-Anchor Point
S- Scale
T-opacity
If you press the U key that exposes all the animated properties of a project. This is useful to find where all your key frames are and adjust them as you need to.
When exporting a file after effects will export the whole duration of your project rather than just the area of time that you have been working with. For example if your file is only 13 seconds but it extends to 30 after effects with export the whole 30 seconds. Selecting the composition menu and then Add to Render Queue, the timeline disappears and the Render queue appears.

Selecting the Lossless option in the Output module Field will bring up a selection window giving you the options of how you would like to export your file.


Once you've selected the options for exporting your project, when clicking render Adobe After effects with start to mange and produce your file, when working with files of a big capacity this can take a while due to the nature of the computer managing with large amounts of data.

No comments:
Post a Comment